📖 Part 1. Configure cluster storage for Kasten
Prior to configuring backups, we need to ensure our cluster storage is capable of performing snapshots of our persistent data workloads. Because our cluster is deployed on top of Amazon EC2, we can leverage EBS storage and it’s associated CSI driver to perform volume snapshot operations.
To do so, we need to ensure our VolumeSnapshotClass object created on the cluster for the ebs.csi.aws.com provisioner is correctly annotated. We need to add the annotation k10.kasten.io/is-snapshot-class: “true”
-
On the bastion host, run the following command to patch the csi-aws-vsc VolumeSnapshotClass so Kasten can use it to perform snapshot operations
oc annotate volumesnapshotclass $(oc get volumesnapshotclass \ -o=jsonpath='{.items[?(@.metadata.annotations.snapshot\.storage\.kubernetes\.io\/is-default-class=="true")].metadata.name}') \ k10.kasten.io/is-snapshot-class=true -
Run the following command to validate the VolumeSnapshotClass has been annotated
oc get volumesnapshotclasses.snapshot.storage.k8s.io csi-aws-vsc -o yaml
📖 Part 2. Configure an S3-compatible Object Store for Backup
Before we can begin protecting our apps, we need to define a location for Kasten to export backup off of the cluster and primary storage.
As part of the lab environment staging, a MinIO Object Storage server has already been deployed to your cluster. This server provides a single bucket, kasten-bucket, that you will use as a backup target.
This is a lab environment. In production, exporting your backups to the same storage as what you’re trying to protect would really defeat the purpose - don’t you think?
- In the projects drop-down in OpenShift, select kasten-io.
-
Find the URL of the Kasten instance by navigating to Networing > Routes in the OpenShift console. Click the Location URL
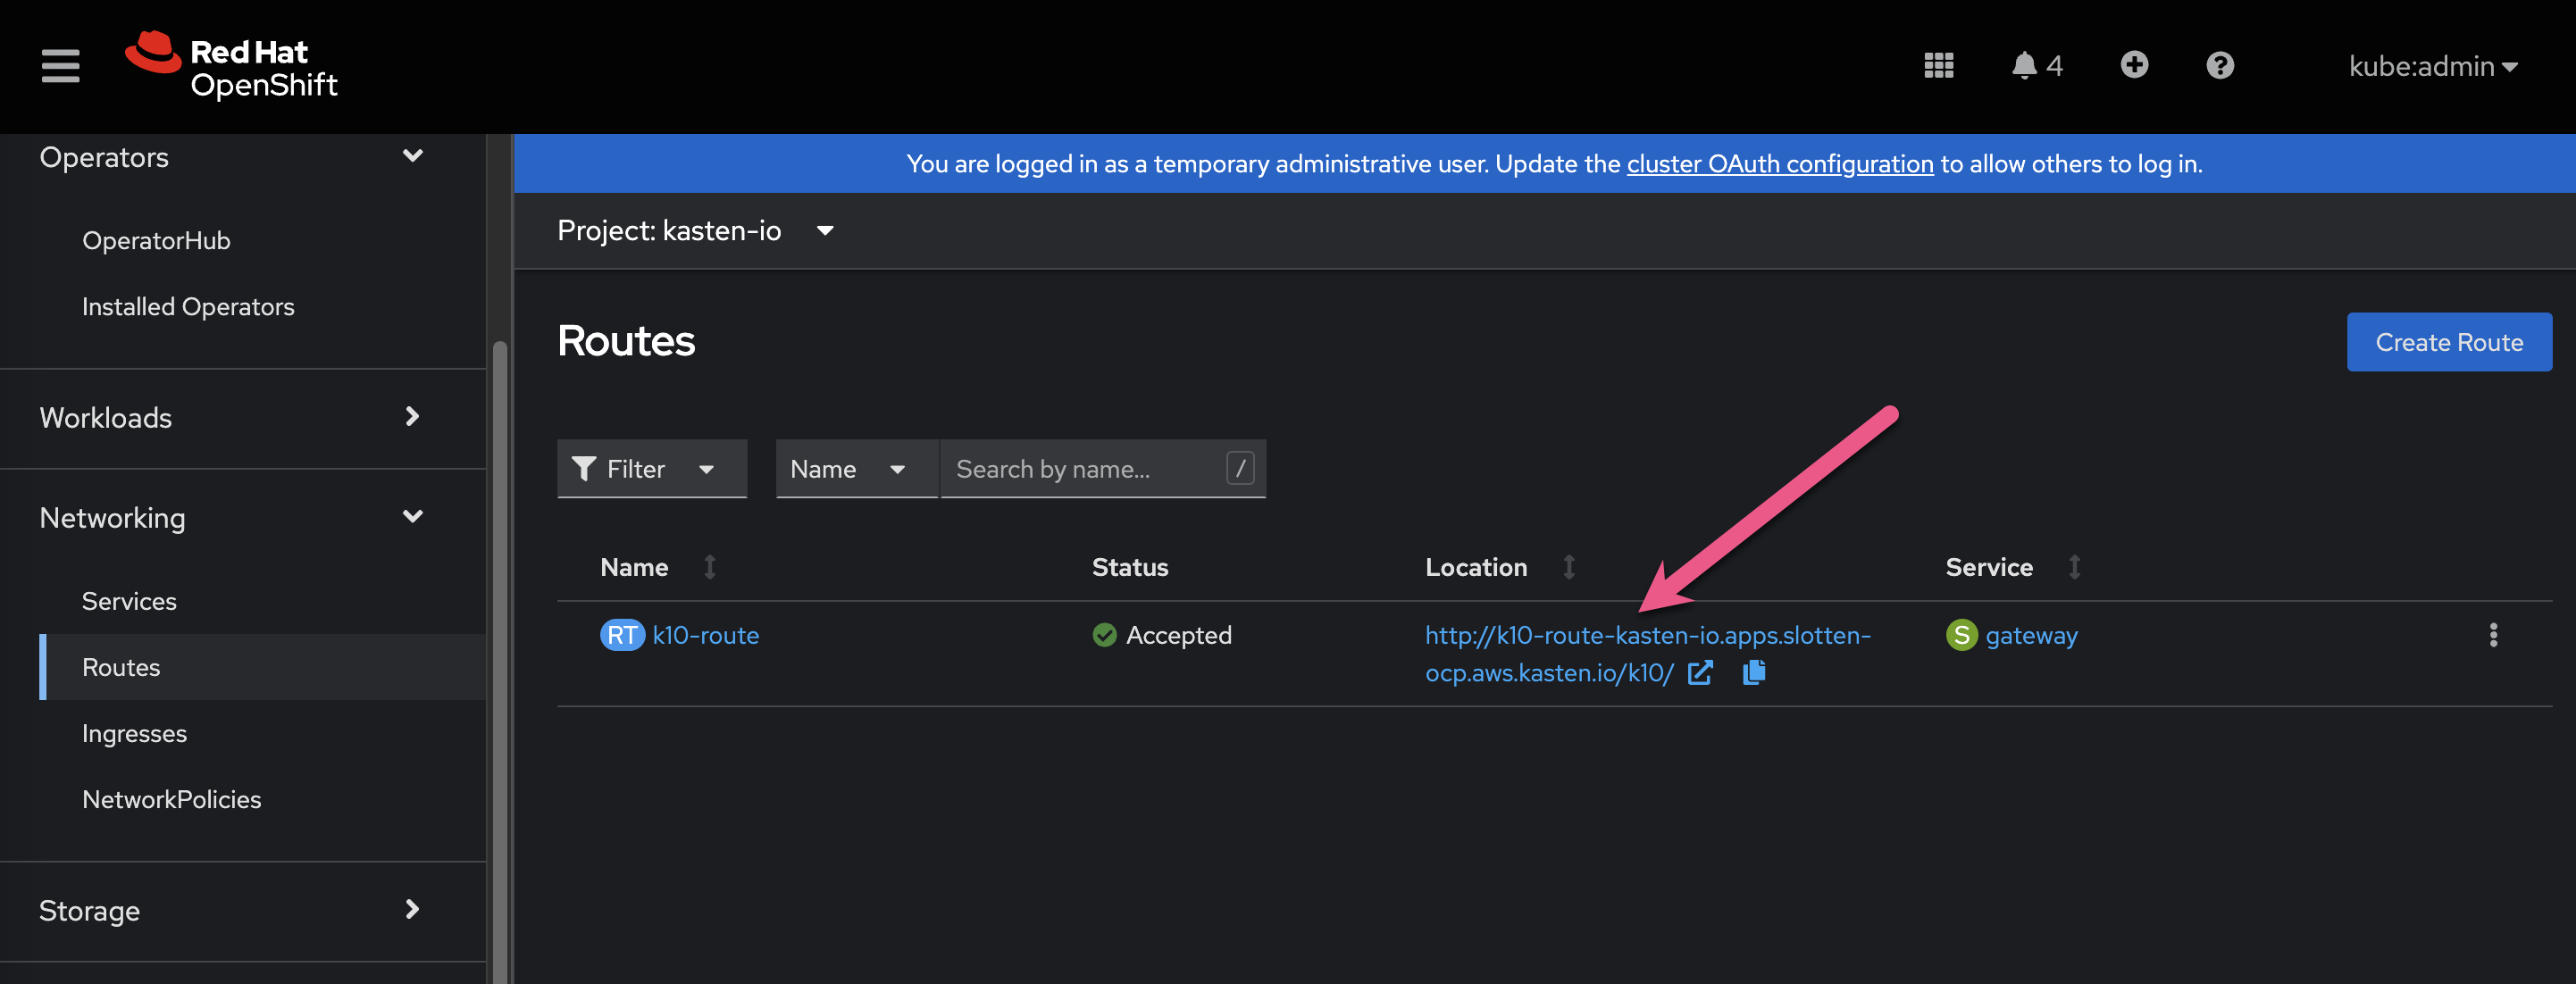 Ensure you have the kasten-io project selected
 -
When prompted for login details, enter the following:
Username Password kasten kasten123 -
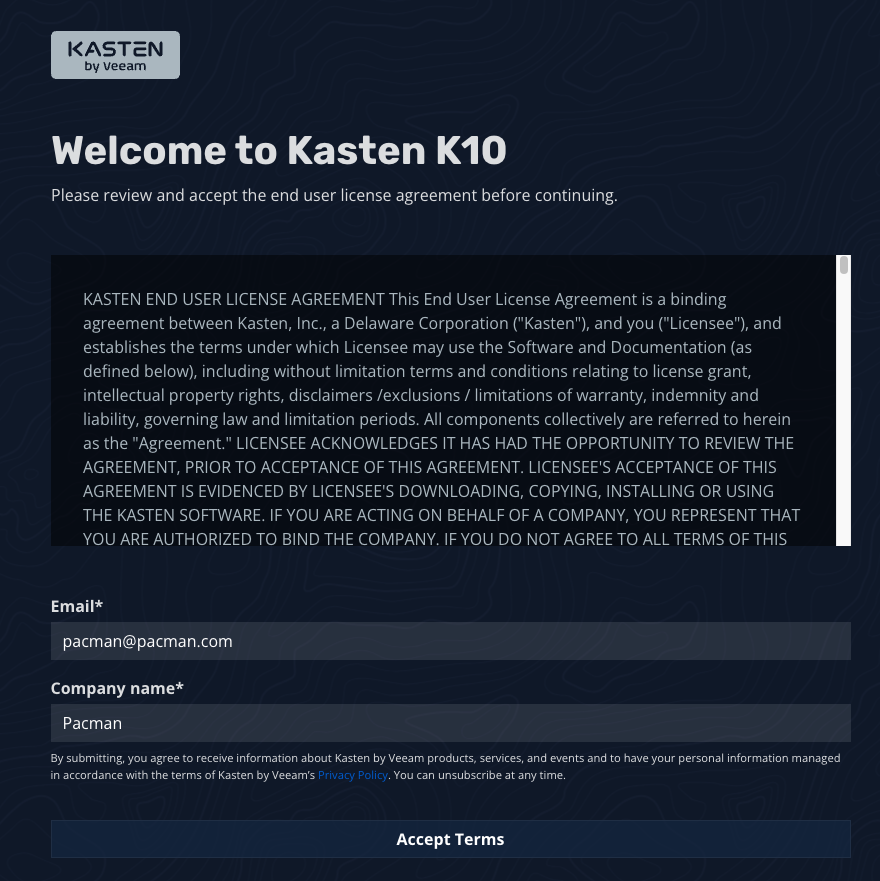
When prompted, enter your email and organization and accept the EULA:
-
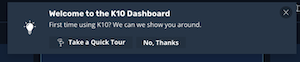
Take a quick tour if you’d like, otherwise just click “No, Thanks”
-
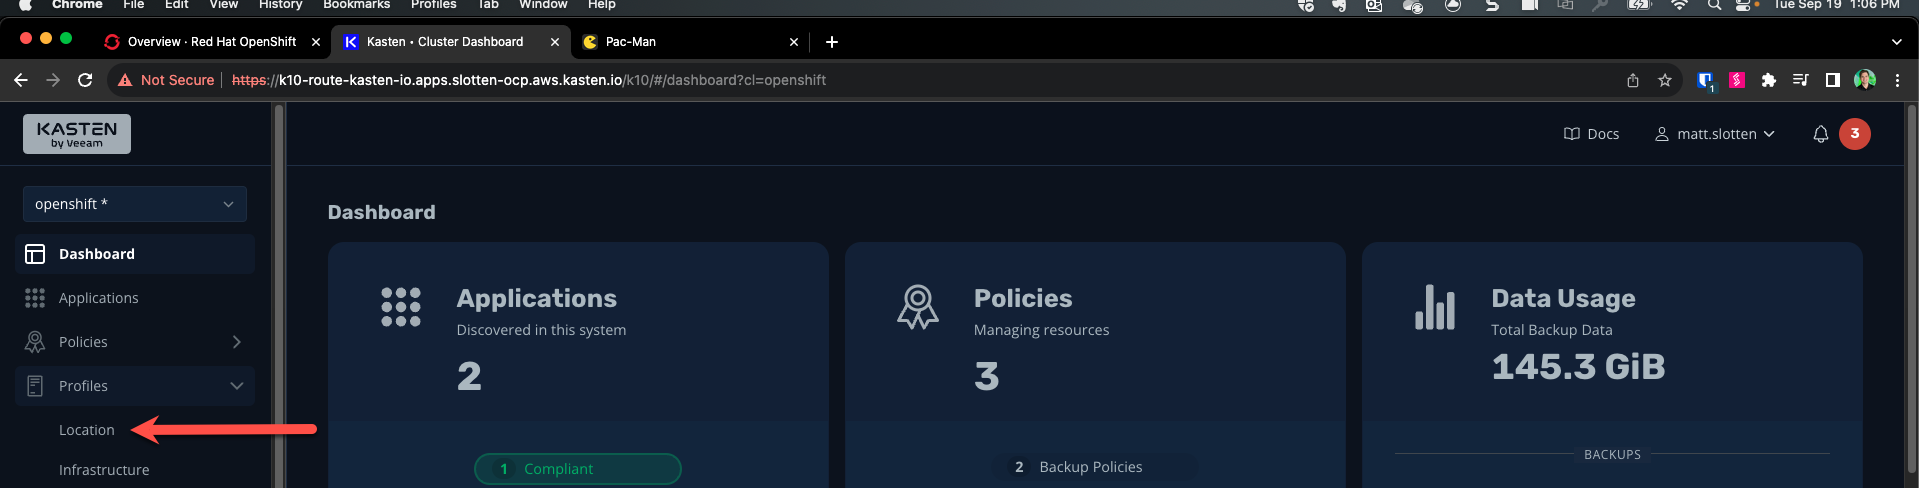
From the Kasten Dashboard using the menu on the left, navigate to Profiles > Location
-
Under Locations, click the + New Profile button.
-
From the environment configuration details for your cluster, copy the hostname of your bastion host to your clipboard (the part after lab-user@). It should look similar to:
bastion.xyza.sandbox1234.opentlc.com -
Fill out the following fields:
Field Value Profile Name minioStorage Provider Select S3 Compatible
(NOTE: This is a separate option from Amazon S3)S3 Access Key minioaccessS3 Secret miniosecretEndpoint Type http:// Paste the URL from Step 2, followed by :9000
(eg.http://<bastion_host_FQDN>:9000)Skip certificate chain and hostname verification Leave unselected Region us-east-2 Bucket kasten-bucket Enable Immutable Backups Leave unselected 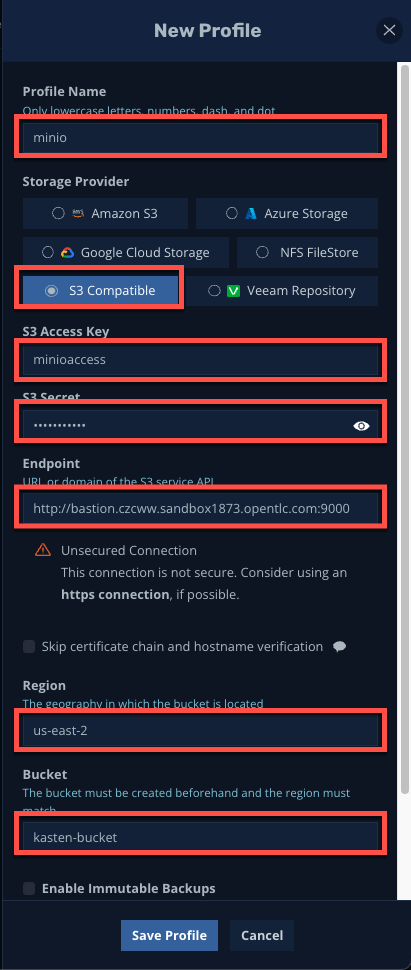
-
Click Save Profile
Occassionally, the Minio server fails to start during the lab’s provisioning. If this happens, you will see an error at this step stating “There was a problem validating the profile”:
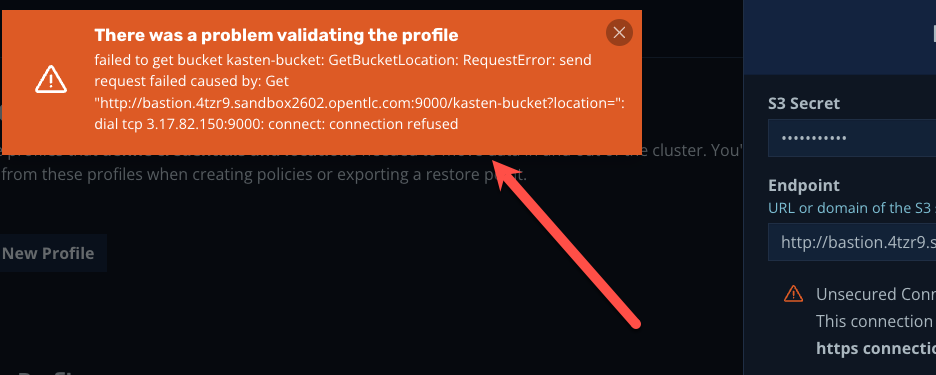 If this occurs, you can manually start the server on the bastion host by connecting to it via SSH and running the following two commands:
sudo su ec2-user
/usr/local/bin/minio server /home/ec2-user/minio --console-address :9090 >/dev/null 2>&1 &
After doing so, return to the Kasten UI and click Save Profile again and Kasten should be able to validate the location profile.
-
Verify the STATUS of your Location Profile is Valid.
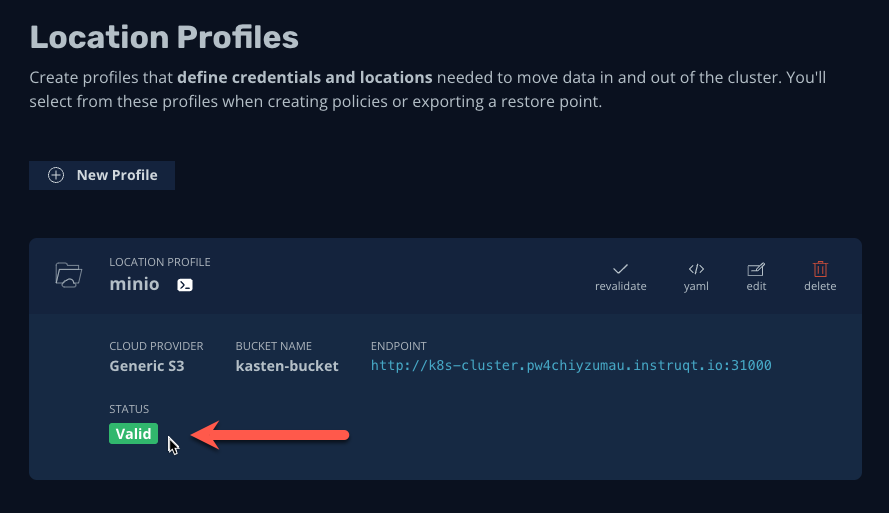
This indicates Kasten was able to successfully authenticate and access the specified object storage bucket.
📖 Part 3. Create A Policy
Before performing a Kasten install, the “Primer Script” can quickly spot any potential problems with our cluster configuration.
-
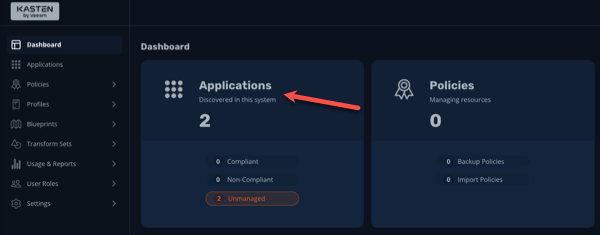
Click < Dashboard to return to the Kasten main dashboard, click Applications to view all applications discovered by Kasten on the cluster.
-
Type
pacmanin the filter search bar, then click the Create a Policy button.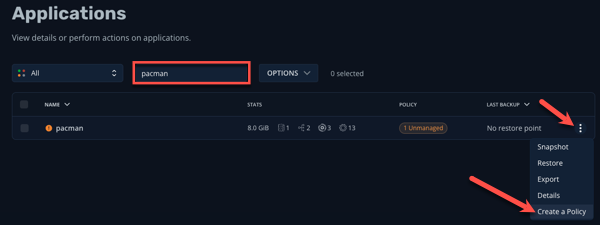
-
Leave the default name and optionally add a comment. By default, the policy will generate hourly snapshots of the application with a standard retention policy. Leave these defaults.
-
Scroll down slightly and toggle Enable Backups via Snapshot Exports to the ON position and select
minioas the Export Location Profile.
-
Under Select Applications observe that we are explicitly protecting all resources in the
pacmannamespace.A single Kasten policy can also protect multiple namespaces, and can even do so dynamically via Kubernetes labels.
-
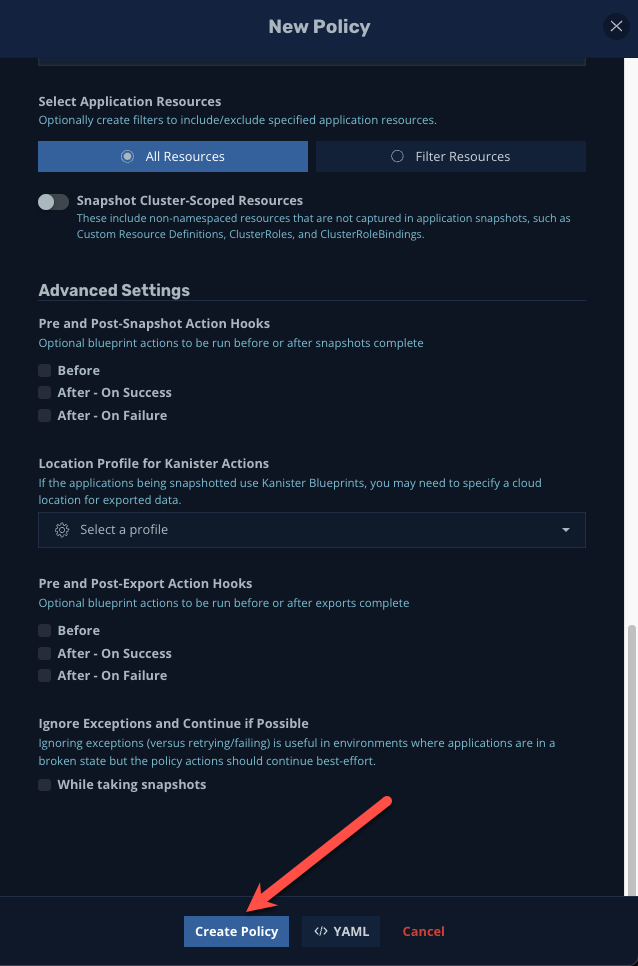
Leave all other defaults and click Create Policy.
-
You will be returned to the Policies page. On your new
pacman-backupPolicy, click the YAML button to view the Kubernetes manifest.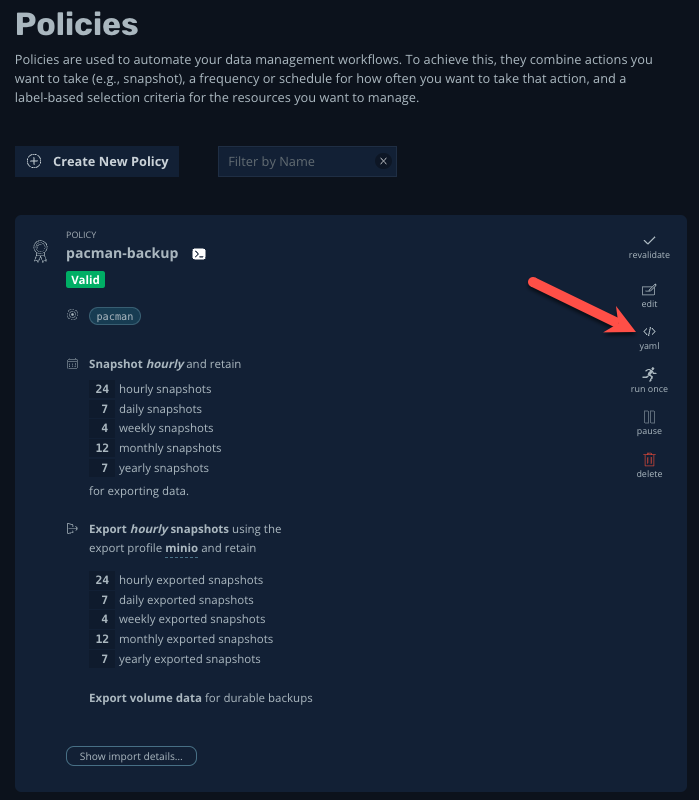
As native Kubernetes resources, Kasten policies, profiles, and even running backups or restores can be easily implemented via
ocor API. Exposing the YAML through the UI makes it easy for administrators to copy and modify existing examples of Kasten resources or actions. -
Click Cancel to close the YAML window.
🏁 Part 4. Takeaways
- Local snapshots are not backups
- Configuring off-cluster storage for backup is a good idea
- Configuring an S3-compatible bucket in Kasten can be done in a few clicks
- Because Kasten is K8s-native, all actions, policies, resources can be implemented using oc commands or API